ingenious offers a generic data import for base files from .csv files. Via the module, own assignments of the table columns of .csv file to the ingenious internal data base fields can be defined. The module is recommended especially for a singular import of existing client and article data. For the automatic, repeated import of updated data or the import of project or position data, the Ingenious Software GmbH offers individual support services.
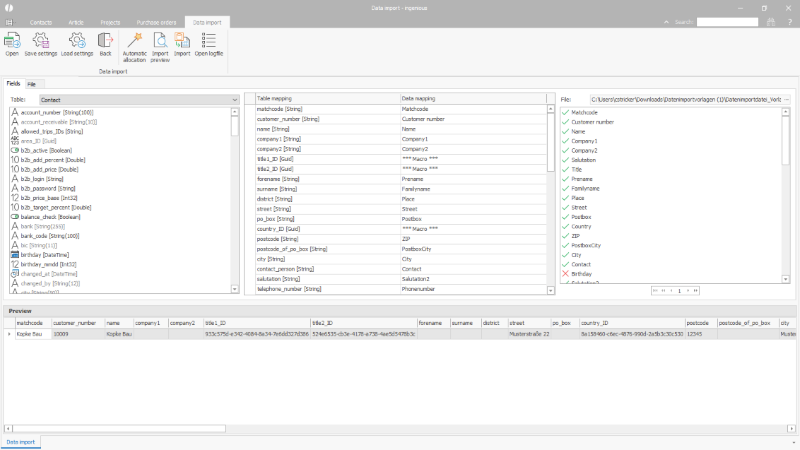
Assignment of the data to be imported to the ingenious.basic data base fields |
In the data import module, the following functions are available via the toolbar.
| Open the file with the data to be imported. | |
| Save the settings and field assignments for the import. | |
| Load recorded settings and field assignments. | |
| End the module | |
| Assign values of the import table to the data base fields automatically. If the column headers of the import table match the data base fields, they are assigned to each other automatically. | |
| Display of a preview of the data to be imported. | |
| Execute data import with the current settings and field assignments | |
| Open log file with error details (The log file has to be activated in advance.) |
The module data import is subdivided into two tab cards. On the first tab card, the data from the import table is assigned to the data base fields. On the second tab card, general settings for the import file are determined. These are:
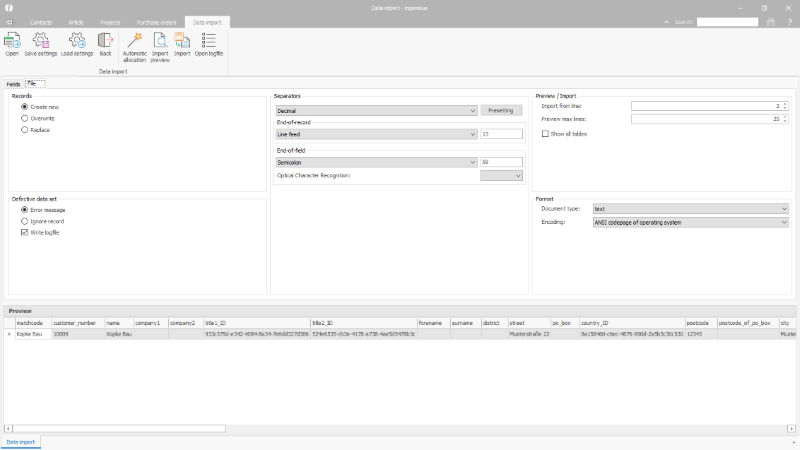
General options for the import |
| Data sets | Radio buttons |
| ||||||
| Defective data set | Radio buttons / Checkbox |
| ||||||
| Separators | Selection list | Definition, how the different separators are displayed / entered. Via the button "presetting" the standard values are loaded. | ||||||
| End of record | Selection list | Selection or input of the character, which designates the end of a sentence in the import file. | ||||||
| End of field | Selection list | Selection or input of the character, which designates the field end in the import file. | ||||||
| Optical Character Recognition | Selection list | Selection of characters, which designate text in the import file. | ||||||
| Import from row.. | Simple input field | Definition, from which line in the import file the data is imported. E.g. from row 1, if the table does not contain headings, row 2, if it does. | ||||||
| Preview max lines | Simple input field | Selection, for how many lines of the import file a preview is shown. | ||||||
| Document type | Selection list | Selection of document type | ||||||
| Encoding | Selection list | Selection of the character encoding used in the import file |
Data import on an example template
For the import of contact and article data, an example template is available, which can be downloaded via the following link:
The template set for the import of contact or article data contains each an example import file and a file with the setting and field assignments. In the example import file, the most important data bank fields are shown as table columns. Here, as many details about articles and contacts as possible should be recorded.
When the file is filled completely, the configuration of the import can be started.
At first, the settings are entered according to the file on the tab "file". These are the semicolon for the field end and for the import from line 2, line 2.
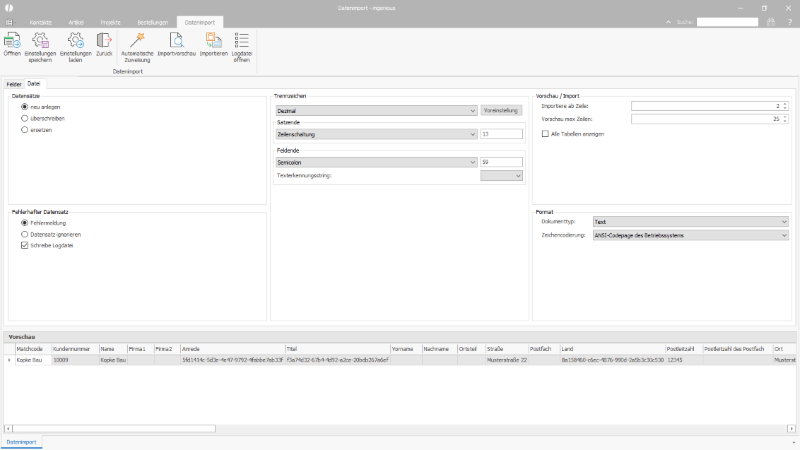
Adjusted import options |
Subsequently, the data import file is opened via the ![]() button on the tab "fields".
button on the tab "fields".
On the right, the table columns of the import file are shown. These have to be assigned to the data bank fields.
In the table and selection area on the left it can be switched between the single data bank tables and the respective fields can be selected.
The fields are designated according to their type (String, Boolean,...) and assignment. Fields in grey font are configurated already. Fields in black font have not been taken into account yet. Bold printed fields (e.g. matchcode) are mandatory for the import.
Via drag & drop the needed fields are drawn to the middle. Likewise via drag & drop, file contents can be assigned in the middle. Fields that are already configurated receive a green check, still missing fields receive a red cross.
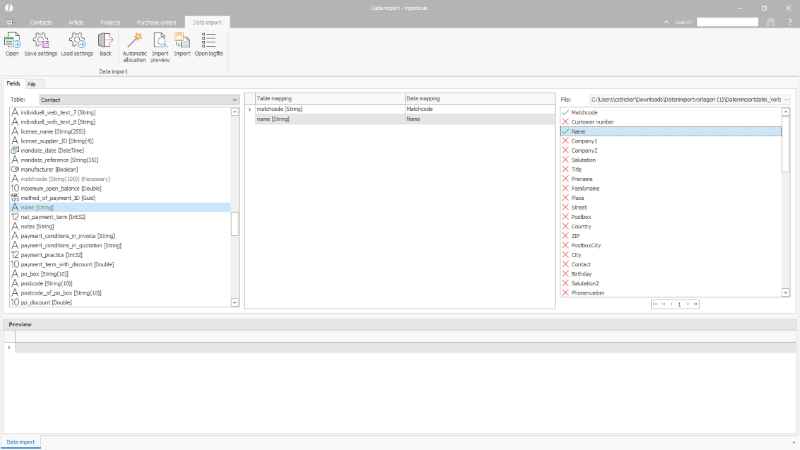
Assignment of the data base fields |
For the example from the template set, a configuration file is available with which the assignment to the correct fields is executed automatically. The configuration is loaded via the respective button from the toolbar.
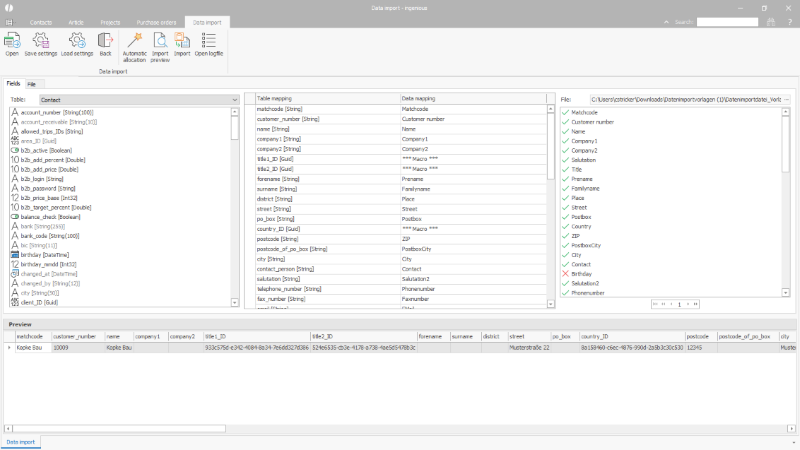
Assignments executed via a template set |
Via the import preview ![]() the data to be imported can be verified and subsequently the import is started via the
the data to be imported can be verified and subsequently the import is started via the ![]() button.
button.
Macro examples
Besides the direct assignment of a fixed value from the import table, the fields can be filled through so-called macros.
To create a macro, an editor is available, which is opened through a double-click on the respective field.
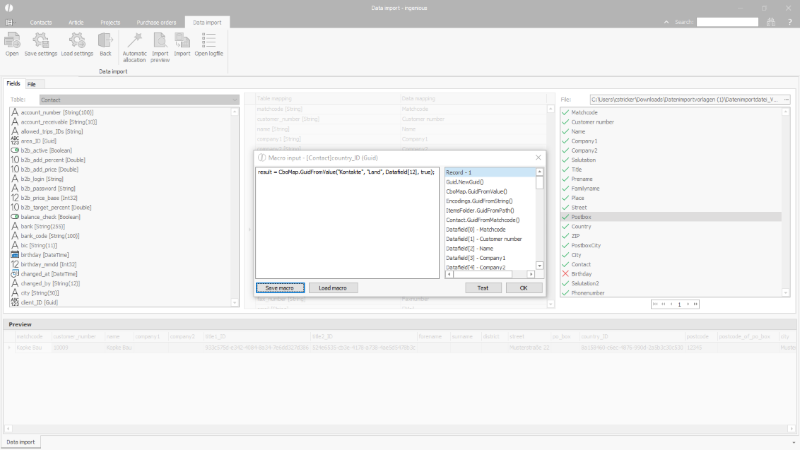
Macro Editor |
The macro can be created with the help of the commands and field selection on the right.
In the example for the field "country", the value from the data field 12 of the import table is assigned to the field type selection list. Additionally, the value is integrated in the selection list of the program settings via the "true".
| Example assignment Country cbo Map |
Copy Code |
|---|---|
result = CboMap.GuidFromValue("contacts", "country", Datafield[12], true); | |